Bring Your Own Satellite
In this last section of the workshop, you will learn how you can deploy a pre-built satellite with a few more bells and whistles.
Once again, you will use Docker to deploy your virtual satellite but this time, you do not have to build it from scratch. Rather, you will simply need to deploy the new satellite using the following command:
docker run --net=openc3-cosmos-network --name HackSpaceCon -p1234:1234/udp -p1337:1337 --rm hackethos/hsc-1

The previous command will download the container image and then deploy it with the name HackSpaceCon.
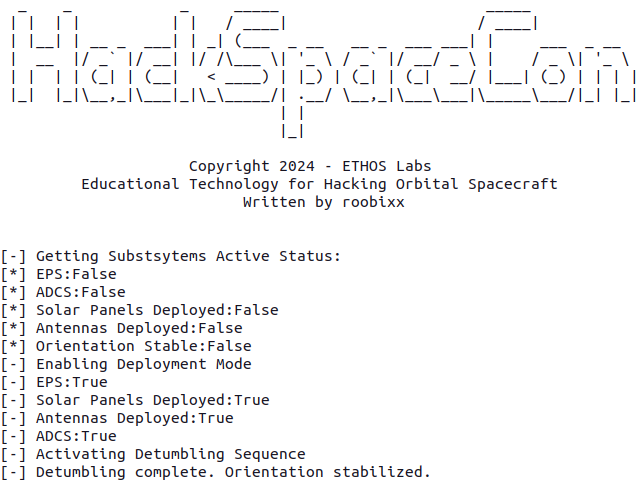
Right after Docker has downloaded the container image, you should see the new satellite running in your terminal window like what is shown below.
With your HackSpaceCon satellite running, you will then need to download the pre-generated COSMOS plugin.
In a new terminal window, you can then run the following command to download the pre-generated COMSOS plugin:
wget https://byos.ethoslabs.space/openc3-cosmos-hackspacecon-1-1.0.0.gem
OR you click the following link from within your VM's browser:
Click Here: Download HSC-1 Plugin

After you have downloaded the plugin file, you need to get the IP address of your container using the following command, looking for the entry for HackSpaceCon as well as the openc3-operator container:
docker network inspect openc3-cosmos-network

Once you have the IP address, you can switch over to your VM's browser and access the Admin Console within COSMOS, to be able to install the plugin.
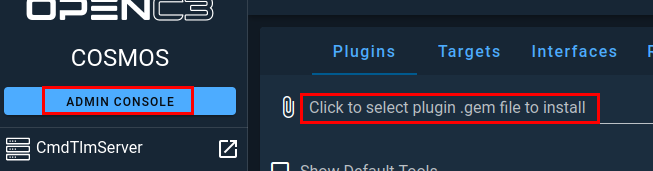
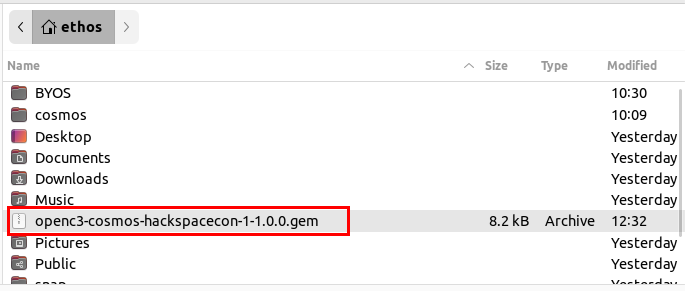
Click on the middle section as highlighted above and then find your newly downloaded plugin and click Select.
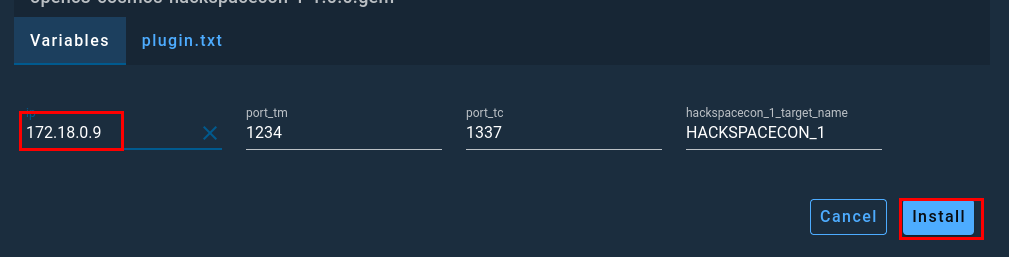
Like the previous section you will need to populate the IP address field for you plugin and then click Install.
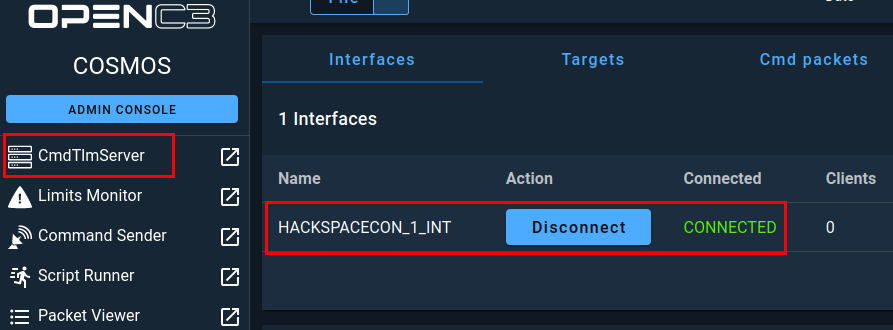
Once installation and configuration is complete, you can click on the CmdTlmServer menu option from the side menu and see that your new interface is connected.
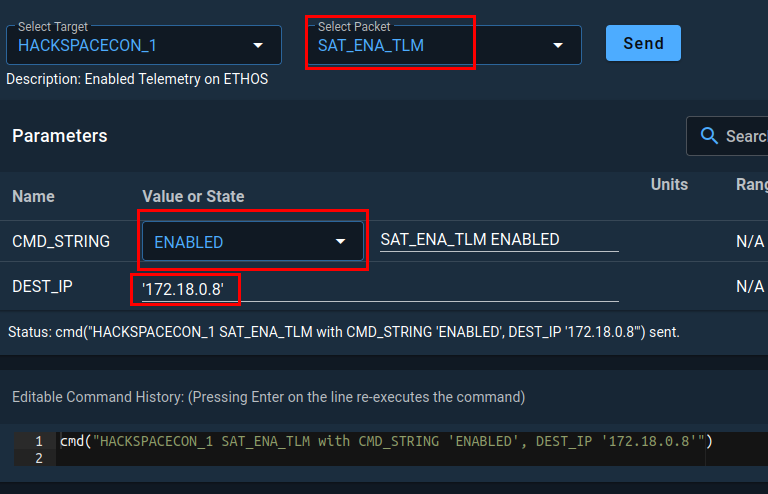
Next click on the Command Sender option and make sure HackSpaceCon-1 is selected as the target. Then select SAT_ENA_TLM as the packet and in the DEST_IP field, insert the IP address of your openc3-operator container and then click Send.
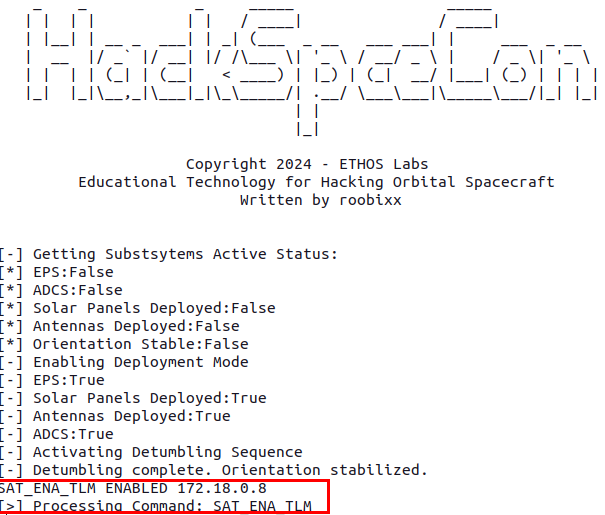
Switching over to your terminal window where your HackSpaceCon- satellite is running, you should see that the satellite received the command successfully.
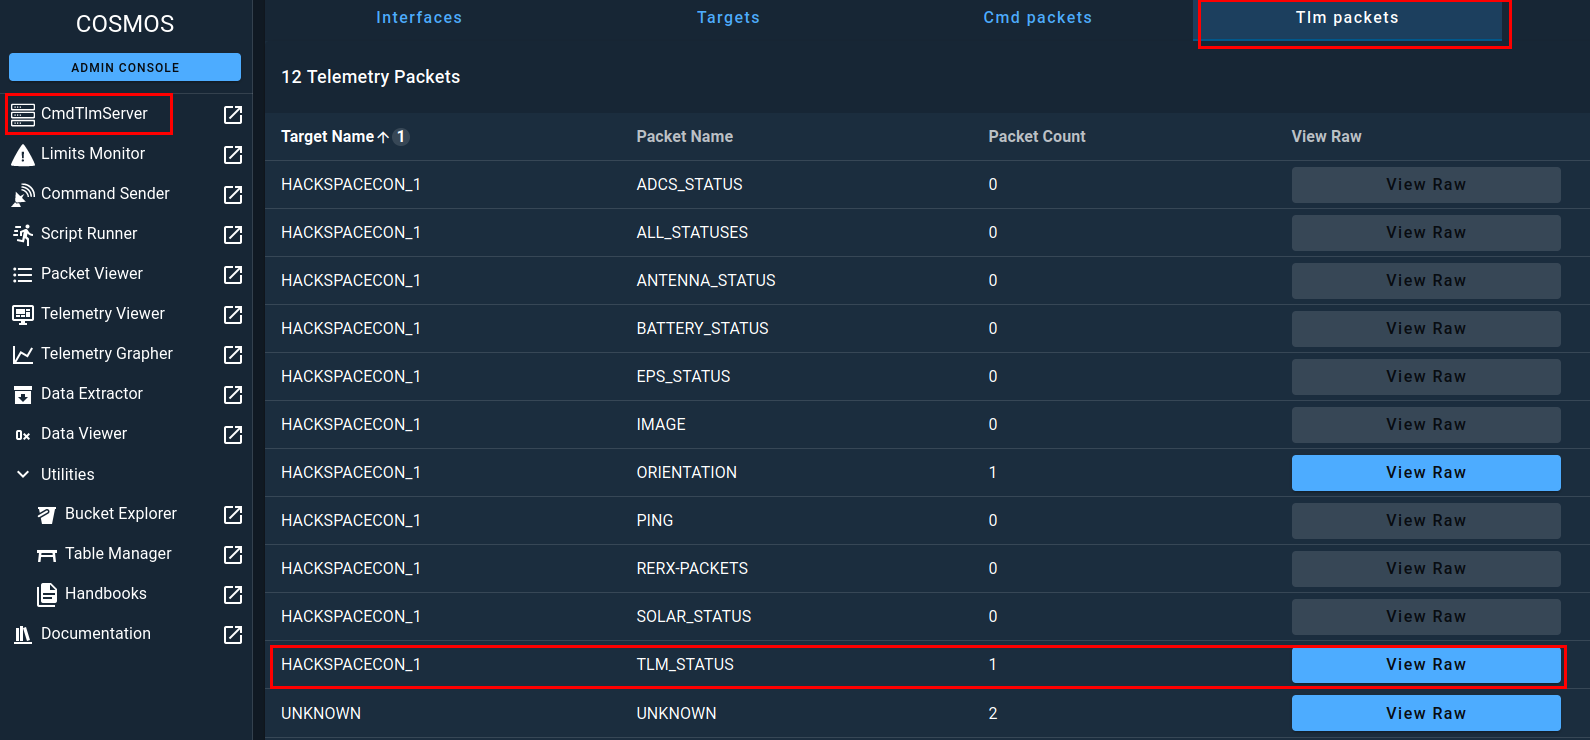
Switching back to COSMOS and clicking on the CmdTlmSever menu option and the Tlm packets option in the top bar, you should see that the packet TLM_STATUS has a packet count of one, meaning that it successfully received data from your satellite.
Note
You may need to expand the number of packets shown from the default 10 to a high number to see the packet.

Feel free to play with the other commands for a moment. Once done, you can remove the plugin from COSMOS using the Admin Console by clicking on the trashcan icon and then you can stop your virtual satellite by hitting crtl+c.